Lift Installation Work Process
Installing a lift (elevator) involves a comprehensive and precise process that requires skilled labor, careful planning, and adherence to safety standards. The installation process typically includes several key phases, from site preparation to the final testing of the system. Below is a detailed outline of how lift installation work is typically carried out:
1. Pre-Installation Planning and Site Assessment
- Site Evaluation: The installation team conducts a detailed site survey to assess the building’s structure, available space, and accessibility for installing the lift. The lift’s specifications are tailored to the building’s height, traffic load, and other parameters.
- Design and Permitting: Based on the site assessment, the lift is designed to meet the building’s needs. Necessary permits and approvals are obtained from local authorities or relevant regulatory bodies to ensure compliance with safety codes.
- Preparation of Installation Schedule: A timeline is created that details each stage of the installation process, ensuring that all teams are prepared and that downtime in the building’s operations is minimized.
2. Structural Modifications (if required)
- Shaft Construction: If a lift shaft is not already in place, the construction of the shaft is initiated. This involves making necessary modifications to the building’s structure, such as reinforcing walls, installing support beams, and ensuring adequate space for the lift car and machinery.
- Electrical and Plumbing Setup: The installation team prepares the necessary electrical wiring and plumbing systems for the lift’s operation, including power supply lines, control circuits, and emergency systems.
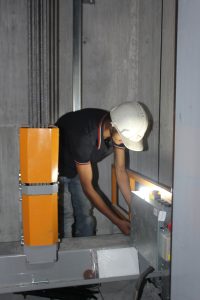
3. Lift System Assembly
- Hoistway Equipment: The hoisting mechanism, such as the motor and drive system (hydraulic or traction), is installed. This includes setting up the counterweight, pulleys, and guide rails that will allow the lift car to move smoothly along the shaft.
- Lift Car Installation: The lift car (or cabin) is assembled and positioned in the shaft. This includes fitting the lift door frames, walls, flooring, and interior fixtures.
- Control System Setup: The control system, which includes the elevator’s electrical circuits, controllers, sensors, and safety systems, is installed. This is responsible for the lift’s movement, speed, stopping mechanisms, and emergency functions.
4. Mechanical and Electrical Connections
- Motor and Drive Mechanism Integration: The motor is connected to the mechanical system, such as the drive shaft, pulleys, and hoisting ropes (in traction lifts) or hydraulic pumps (in hydraulic lifts).
- Power Supply: The lift system is wired to the building’s electrical supply, with dedicated circuits and safety mechanisms to ensure the lift operates within safe voltage and power parameters.
- Safety Features: Essential safety systems are integrated, such as emergency brakes, buffer springs, overload sensors, emergency stop buttons, and fireman’s operation for use in case of fire.
5. Lift Car Installation and Final Assembly
- Lift Car Placement: The lift car is securely positioned on the guide rails and connected to the hoisting mechanism.
- Door Installation: Lift doors, both on the car and on each floor, are installed and tested for smooth operation. These include automatic sliding doors or manual swing doors, depending on the lift type.
- Control Panel Installation: The lift control panel inside the car and on each floor is connected, allowing passengers to call the lift and select floors. These panels also include emergency communication systems.
- Safety Checks: Final safety features such as overload detection, door sensors, and emergency lighting are installed and verified.
6. Testing and Commissioning
- Initial Testing: The lift undergoes a series of preliminary tests, including weight tests, speed, and smoothness of travel, door operation, and safety feature functionality. This may involve loading the lift with test weights and running it through various cycles.
- Adjustment of Settings: The control systems and sensors are calibrated to ensure the lift operates smoothly and accurately. This involves fine-tuning speed limits, leveling precision, door timing, and other parameters.
- Safety Certification: The lift is inspected by certified engineers or safety officers to ensure it complies with local building codes, national safety standards, and international regulations. A formal safety certificate is issued if all requirements are met.
- Customer Training: Operators and maintenance staff receive training on how to use, maintain, and troubleshoot the lift.
7. Final Handover
- Documentation: The client receives all the necessary documentation, including user manuals, maintenance guidelines, and warranty information.
- Handover: The lift installation is officially completed, and the system is handed over to the client for regular use.
- Ongoing Maintenance: The lift servicing team ensures that a schedule is in place for regular maintenance, periodic checks, and servicing to keep the lift running efficiently.
Conclusion
Lift installation is a multi-step process that requires careful coordination of different teams, including structural engineers, electrical engineers, and lift technicians. Each stage of the process must be carried out with precision to ensure that the lift operates safely, efficiently, and reliably. Once installed, the lift will provide essential vertical transportation for the building’s occupants and goods, serving its intended purpose for many years.